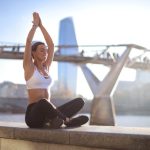
Many people come to yoga as a way to increase their flexibility. I certainly did and I remember SO clearly how impossible some yoga poses seemed to be. How could I even dream of doing an utthita pādāngusthāsana balance (standing big toe hold) when I couldn’t actually reach my big toe? My adho mukha śvānāsana (downward-facing dog) looked more like a plank than a pyramid. And the floor was WAY TOO FAR away to touch in my attempts at standing forward folds.
But was I down heartened? Well, actually I was… I thought maybe I was ‘too tight’ for yoga. Too stiff to get anywhere. But I was wrong and my yoga teachers knew that lack of flexibility is no barrier to a budding yogi. They knew that with care and perseverance, yoga was JUST what I needed. They taught me versions of poses that I could manage. Versions that did increase my flexibility and modifications that worked for my beginner’s body. Amongst other things, they showed me poses that were perfect for my tight hips and short hamstrings. And now as a yoga teacher, I absolutely LOVE showing beginner yogis these poses. So, if you are a wobbly warrior with the flexibility of an ironing board – read on! These beginner hip opening poses are perfect for you.
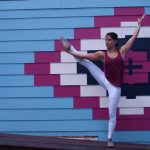
1) FORWARD FOLDS
All forward folds open the back of the hips by lengthening the hamstrings and glutes. A lovely beginner’s version allows you to use your arms to support your upper body in the fold. Try it by standing with your feet hip-width apart and a chair in front of you. Keeping your back straight, fold forward at the hips until you can place your hands on the seat of the chair. Rest here for a moment and work the legs to lift your sit bones up towards the ceiling at the same time as you push down through your heels. Keeping the sit bones high and your back straight, bend your elbows and fold a little deeper until you feel a definite but comfortable stretch at the back of the legs. You can try it with your legs wider apart too to target the inner thighs as well as the backs.
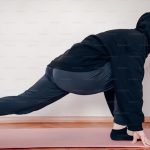
2) LOW CRESCENT LUNGE
Lunges are a great way to stretch the front of your hips without needing to be very good at balancing. Start kneeling with one knee on the floor and the other one lifted so that the foot is flat on the floor (this position is sometimes called half kneeling or taking a knee). Ideally, both knees are bent to about 90 degrees – feel free to shuffle around to find this position! Now find your balance and take a big, deep breath as you raising your arms overhead and lookup. One option is to hold this position for a few deep breaths. Alternatively, you can raise the arms with a breath in, then lower the arms when you breathe out. Repeat the lift and lower for 5 or 10 breaths – such a delicious way to work with this pose. And remember to do just as many on the other side for balance.
3) SLEEPING PIGEON
This is entry-level pose uses a yummy hip twist to work into the sides of the hips. Start lying on your back with both knees bent and your feet flat on the floor. Place one ankle on the other knee then let the raised knee drop out to the side. If you are feeling a stretch in the hip or buttock already – stay here and let gravity do the work! If this first position becomes comfortable, try pushing the raised knee away from your face using a hand until you feel a stretch in the hip. Hold for a few slow deep breaths then repeat on the other side.
4) BADDHA KONASANA
Also known as bound angle pose, this is such a satisfying way to lengthen the inner hips and groin. Sit on a block or cushion so that your buttocks are raised a few centimetres off the ground. Bend both knees and place the soles of the feet together so that your knees are pointing outwards away from each other. Move your feet towards your groin to find a comfortable starting position (and don’t worry if they are still a long way away from your groin – they will get closer with time). Now take hold of your ankles or shins and lift your knees up a little to prepare. Next, straighten your back and lift your chest up as you draw your shoulders back and down. If you feel a stretch in the groin here – hold this version for a few breaths. If this first stage is comfortable, gently lower the knees towards the floor and let gravity find a stretch. The real challenge with this pose if to keep your chest lifted as you hold the stretch.
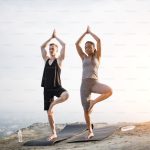
5 ) TWO FOR THE PRICE OF ONE STRETCH
Now, I’m not sure if this is considered a ‘real’ yoga pose but it is my absolute FAVOURITE for beginners hip opening. To try it, lie on your back and hug both knees to your chest. Choose one knee and take hold of it with both hands then draw that knee out towards the armpit. Then straighten the other knee and lower the whole leg down so that it hovers just above the floor. Hold here for a few breaths. This fabulous position stretches the back of one hip and the front of the other all at the same time – bonus! Don’t forget to repeat on the other side.
These poses will REALLY make a difference to your hip range of movement. Use them to start your journey towards those iconic poses that seem SO impossible now. And be remember to be patient. As Pattabhi Jois said – ‘Practice and all is coming’. Baby steps, little gains, and kindness are the stones that pave the way to happy, healthy and open hips. I do hope you enjoy the journey as much as I am – it is a lovely path!