
Lower back pain is the number one cause for complaints. Most people will experience back pain at some point in their lives. Why is back pain so prevalent?
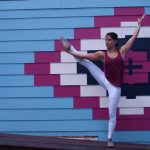
Ready, set, sit!
Most of our lives are spent sitting; the commute to work, sitting at work, the commute home, sit down to dinner, and sit down and relax on the couch. These 12 hours of sitting shorten the hamstrings and iliopsoas causing back pain. There is also very little movement so the joints get “sticky” and don’t allow us to move properly.
“But I don’t sit all day, I’m an athlete and still have back pain!”
Any weight bearing exercise or even with impact like running, jumping or fast dynamic movements can cause tension in the low back. If there isn’t a proper warm up and cool down like foam rolling and stretching, this can make matters worse.
See Also: Sitting Is the New Smoking: And How Yoga Can Help
How Can Yoga Help?
I’ll be delving into these muscles to help release lower back pain for all. Remember to take it slow and easy. If you have fused or slipped discs in your low back, please refrain from practicing these for this will make matters worse. You can do these poses daily to loosen up the tension in the back and get more movement back into the spine and hamstrings.
Loosening Up the Back Sequence
Grab your mat, a strap and some blocks and let’s loosen up your back!
1. Reclining Big Toe Pose (Supta Padangusthasana)
- Lie on your back, legs extended, feet flexed pressing out through the heels.
- On an exhalation draw the right knee into your chest, loop a strap around the arch of the right foot, or hook your first two fingers around your big toe if you have the flexibility.
- Straighten and extend the right leg up to the ceiling until the arms are straight keeping shoulders pressing into the floor.
- Keep strongly extending through the left leg pressing the top of the left thigh down (with your hand) and extend through the right heel creating a comfortable stretch in the back of the leg.
- Stay here or turn the right leg out and bring the leg down towards the floor on your right side. Keep the left hip grounded to the floor rather than bringing your leg further out.
Stay in each variation for five breaths or up to three minutes. Repeat on the other side.
2. Two Knee Spinal Twist (Supta Matsyendrasana)
- Begin by lying on your back. Exhale as you press your lower back lightly into the floor.
- With your abdominal muscles contracted, inhale as you bend your knees and lift your feet off the floor.
- Exhale, as you open your arms out to the side in one straight line with your shoulders, palms facing down for support. Continue to support your spine with your core muscles. Bring your feet and knees together.
- As you inhale lift your heels slightly higher than your knees.
- Exhale as you slowly lower both legs to the left to the floor keeping your feet and knees stacked. Knees should be at the level of your hips and your heels resting about a foot away from the buttocks.
- Continue to breath slowly as you let your head turn naturally to the right. Encourage your right shoulder to root down maintaining the twist through the upper spine. Having arms at or just below your shoulder level will increase the ease of rooting the shoulders down. Hold for at least 20 seconds.
3. Downward-Facing Dog (Adho Mukha Śvānāsana)
- Begin on all fours with your knees hip-width apart and your hands shoulder-width apart.
- Make sure your hips are directly over your knees and your shoulders over your wrists.
- Walk your hands a few inches in front of your shoulders.
- Curl your toes under, lift your hips, and straighten your legs as best you can.
- Push into your palms and fingers to draw more energy into your lower body to help elevate your pelvis.
- Stretch out all ten fingers, whilst pushing down primarily between the index knuckle and thumb.
- Keep your arms straight and rotate your outer upper arms inward to broaden your back.
- Draw the front of your rib cage in and press your legs back, lengthening behind your knees.
- Extend your heels away from your toes and pull them toward the floor.
- Move your sits bones towards the opposite corner of the room.
Modification: Bend your knees to keep your back flat and heels off the ground. Slowly start to extend your legs, only as far as your hamstrings will let you before your back rounds.
4. Triangle Pose (Trikonāsana)
- Begin with your feet parallel and one leg-length apart.
- Rotate your left foot out to a 90-degree angle and your right foot in to a 45-degree angle, keeping your heels aligned.
- Lift your arms parallel to the floor, extend your left arm and that side of your waist forward, and move your left hand to the floor outside your left ankle.
- Extend your right arm straight up, so your right shoulder is directly over your left.
- Revolve your torso to open it and equalize the lengths of both sides of your waist.
- Keep your lower belly engaged and your legs straight.
- Repeat on the opposite side.
Modification: Place a block underneath the hand if you can’t reach the floor
5. Wide-Legged Forward Fold (Prasarita Padottanasana)
- Start with your feet parallel and one leg-length apart.
- Put your hands on your hips and engage your quads.
- Keep rooting yourself in the outer edges of your feet as you hinge forward from your hips, moving your hands to the floor shoulder-width apart.
- Inhale as you extend your chest and straighten your arms
- Exhale as you walk your hands as far back as they’ll comfortably go, bending your elbows to 90 degrees and placing the crown of your head on the floor (or as close to it as you can get)
- Keep your elbows over your wrists and your shoulders lifted.
Modification: Place blocks underneath the hands if you can’t reach the floor.
6. One-Leg Pigeon Pose (Eka Pada Kapotāsana)
- Begin in Downward Facing Dog with your hands and knees hip width apart.
- Bring your right knee toward the front of the mat so that it is at the back of your right wrist and slide your left leg backward so that only the kneecap and top of your foot are in contact with the mat.
- Lift your torso up and away from your thigh using your fingertips to ground yourself, simultaneously allow your tailbone to lower toward your heel while keeping your hips squared forward.
- Balancing your weight evenly on either hip you can lower your gaze or raise your chin and focus your eyes skyward, holding for 10-15 breaths.
Do this routine once or twice a week to help release the hamstrings and relieve tension in the lower back. Be aware of your back so you don’t pull or aggravate it. Let me know what you think! I’d love to hear from you and the asanas you love to release your lower back.