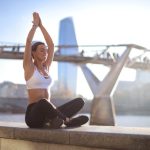
When we think about a comfortable seat it is usually a version of cross legged sitting that comes to mind. But so many students find it far from easy to sit cross legged on the floor. As a foundation pose for many yoga practices, finding a comfortable seated position is vital. Come with me on a journey from ‘dukha’ to ‘sukha’ in sitting.
The Original Asana
Prior to the 11th Century, asana was not the wide range of poses that we know now. Asana referred simply to a seated pose. One that a yogi could find ‘ease’ in. These days the iconic seated pose in yoga is padmasana, or Lotus, but it can take years of dedicated practice to achieve the full expression of the pose. Lotus requires hips that externally rotate a lot in a flexed and abducted position — this can be impossible for some shaped hip joints and as a teacher you’ll need some alternatives at your finger tips.
Variations on a Seated Pose
Sukhasana is basically sitting cross legged and, ironically, it means ‘easy pose’. There are a range of options for students that can be considered as a series to progress though as well as a couple of alternative positions.
- Ankles tucked under opposite shin — Traditional cross legged sitting you probably used as a child
- Shins parallel and resting on floor — Bring one foot towards the pelvis on the floor and rest the other in front of it. As the hips become more open, aim to get the heels in line
- Half lotus — Draw one foot up to rest on the opposite thigh, as high into the groin as is comfortable. Keep the other foot on the floor.
- Full lotus — As for half lotus then draw other foot up on to the other thigh. Both feet should have the soles pointing upwards.
See Also: Asana: The Steady and Comfortable Seat
Modifications are the Way Forwards
In all versions of sukhasana there are elements of posture that you are aiming to achieve. The pose should provide a steady seat with the student grounding through the sit bones equally. Drawing the flesh away from the ischial tuberosities as you set up the pose can help here.
The knees should be lower than the anterior superior iliac spines (ASIS). You can find these on the front of the pelvis as the bony knobble that you can feel pointing forwards at the end of your iliac crest. If your knees are higher than your ASIS, sit on one or more blocks, a zafu or bolster. This simple modification raises the hips, allows the pelvis to tilt anteriorly and drops the knees. It is a real game changer.
The pelvis should tilt anteriorly to achieve a normal lumbar lordosis — many people with tight hips compensate by rolling back on to the buttocks. This results in posterior pelvic tilt, loss of the lumbar lordosis, rounded shoulders and a whole world of discomfort. Placing blocks or bolsters under the buttocks also work wonders here. It improves how the pose looks, creates space in the anterior body and makes life so much more comfortable.
Even with support under the pelvis, some students won’t be able to get their knees resting on the floor. For these students, blocks or folded blankets tucked under the thighs provides additional stability and comfort. There is also the option to tuck folded blankets between the ankles and the shins to provide even more support.
In all options the shoulders should be stacked over the pelvis, the chest is broad with scapulae drawn together and down towards the waist. The crown of the head is lifting as the sit bones are grounding. Hands can be resting on the knees or in the lap.
See Also: 5 Essential Mudras and When to Use Them
Alternatives to Sukhasana
There will still be some students that will never be comfortable in sukhasana. They may have lower limb joint problems, back pain or simply not like the pose. These students may prefer kneeling or here are a few versions you can try:
- Block or bolster under buttocks — This reduces pressure on knees if full flexion not comfortable.
- Padding under knees — Increases comfort
- Rolled towel under ankles — Reduces the amount of plantar flexion needed at the ankles and can make a big difference.
- Astride a pile of blocks or bolster — This opens the hips and moves the weight of the torso to the support making the legs generally more comfortable
Or there is always the option of sitting in a chair. Crossing the ankles and dropping the knees out a little reproduces some elements of sukhasana and the pelvis, spinal and arm positions are exactly the same as sukhasana.
Tricks for Success
Here are a couple of other tricks that can help students:
- Having the palms facing up, with or without a mudra, externally rotates the shoulders and helps to broaden the chest.
- Placing the hands palm down over the front of the knees and then drawing then back towards the body activates lattisimus dorsi, via is origin on the iliac crest, and anteriorly tilts the pelvis. This can be really helpful for students who are struggling with the concept of isolating pelvic tilt in their practice.
- Beware of the students trying lotus before their hips are open enough. If the body is ready for lotus, the knees will be comfortable in the pose. Any hint of knee pain is an indication that there is insufficient external rotation in the hips to remain there safely.
It can be really hard to persuade students to use props to improve their sukhasana but once they feel how much more comfortable it is they are often converted.
Sukhasana should be comfortable. It creates space in the front of the body and length in the back. It aims to maintain the normal curves of the spine. It requires some anterior pelvic tilt and the knees should be lower than the ASIS. It is a foundation for so much and students who find sukha, or ease, in their seat will be able to access so much more than those that struggle.
See Also: An Intro to the Different Kinds of Meditation (Part One)