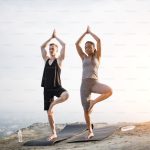

This week’s practice is all about back and biceps! For most of the general population we all sit hunched over a computer (as I’m writing this I constantly correct my posture, I get lazy too sometimes), so it’s great to move out of our usual range of movement!
It’s a common theme that yoga works well to reverse the effects on our back from sitting all day long. Another good technique to help pull those shoulders back is to add a few repetitions and very light weight. This assists in pulling the overly stretched trapezius, rhomboid muscles, and posterior deltoids (upper back and rear shoulders).
In every movement we do, there is always a ‘helper’ muscle (the synergistic muscle, if you’d like) and for back exercises and āsanas, the biceps naturally get to work as well! Ergo, we will be giving those lovely muscles a little added boost because when the sun’s out, guns are out.
To maximise the benefit of training these areas, it’s useful to approach them in a specific way so I will be adding a few non yoga props into this routine. However, please don’t feel the need to use them if you are not comfortable.
Back Flow Part 1: Ready To Rep?
To warm up, start off with a few simple twists like: Sukhāsana with Twist, Maricyasana C, and Ardha Matsyendrāsana. These poses will help loosen up the spine to get you ready to work in the upcoming back bends.
1. Ardha Uttanāsana (Half Forward Bend) with Flys
- From Uttanāsana, raise your back halfway up so you are parallel with the floor. Draw your navel to your spine and use your abdominal muscles and back muscles to keep you here. Bring your hands directly underneath your shoulders (they shouldn’t be touching the ground), then bring them out to your sides like the letter “T.” Squeeze your shoulder blades together so you are pulling your shoulders back and down your spine.
- Hold for ten breaths. This is strengthening your trapezius, rhomboids, quadratus lumborum, and core!
Amp It Up: Grab some light weights and add some reps into it. Bring your arms from beneath your shoulders to the side and back again for 12 repetitions.
2. Añjaneyāsana (Crescent Pose) with Hammer Curls
- Begin in Tadāsana. Step back about one leg length with your left foot as you bend your right knee to a 90-degree angle. Keep both feet hip-width apart, with your weight resting on the heel of your front foot and on the ball of your back foot. Engage your lower belly to extend your lower back and raise your arms straight over your head, keeping them shoulder-width apart.
Repeat on the opposite side.
- We are going to really amp it up and add some weighted bicep curls. Grab some light weights, turn the palms inward toward your thighs and the thumbs facing forward. Slowly curl your hands up towards your chest then down while keeping your elbows glued to your sides.
- Do ten repetitions on each side. The hammer curls are targeting your biceps brachii muscles.
Modification: If you don’t have a light enough weight or weights at all. Grab a water bottle! They are the perfect size and not too heavy.
3. Pārśvakonāsana (Side Angle) with Concentration Curl
- Have your weight close by your feet. Begin in Warrior 2. Starting on the left, extend your entire left side over your forward leg as you place the fingertips of your left hand on the floor to the outside of your front leg. Reach up with your right arm and rotate your palm forward. Extend your arm overhead to form a straight line with your back leg, rolling the outer side of your arm in toward your body to relax your shoulder. Keep your chest open.
- Grabbing your weight (or water bottle!) with your hand closest to the floor. Brace your elbow against your knee and curl your hand towards your chest then back down.
- Repeat for ten reps on each side. Concentration curls are, you guessed it, working on your biceps brachii muscles again.
Modification: Bring your top hand down to your hip for more stability.
Feel free to take a little break here in Child’s Pose (Balāsana) and Adho Mukha Śvānāsana before we continue with the back!
Back Flow Part 2: Things Are Looking Up
4. Salamba Bhujangāsana (Sphinx Pose)
- Lie on your belly, legs stretched out behind you. Place your hands flat on
- the floor with your elbows slightly forward of your shoulders and cross your forearms. You should be able to touch opposite elbows — this ensures that your elbows are shoulder width distance apart.
- Then stretch your hands forward; the bend in your elbows should be approximately ninety degrees. Spread your fingertips wide apart from one another and root down through your hands. Press down through the tops of your feet and, keeping your legs firm, pull the floor towards you to lift up with your chest and draw your shoulders slightly back. Keep the back of your neck long, do not crank your head back. Engage through your belly to support your lower back.
- Hold for ten breaths. We are just starting to warm up the spine and back with a few gentle back bends.
5. Matsyāsana (Fish Pose)
- Begin by lying on the floor with both knees bent and feet flat on the floor. Bring your arms by your side, palms down. Lift each hip to allow your thumb and first few fingers to fit under your hip, and place your hips back down. Bend your elbows, keeping your hands under your hips, and press into the earth with your forearms, lifting your body from the floor. Allow your pelvis to rock almost onto your sitting bones, accentuating the natural curve of the low back. Send your heart upwards and backwards, creating a back bend in your thoracic spine, where your rib cage is.
- Picture your spine getting longer and arching gently into a backwards curve. Imagining your neck as an extension of your spine, reach out from the crown of your head, perhaps finding the floor with the back or crown of the head.
- Hold for ten breaths. This is working on drawing back the shoulders and working on the posterior deltoids, rhomboids and trapezius muscles.
Amp It Up: Focus on really drawing the shoulder blades down the spine and lifting your chest up. This will really work your back.
6. Purvottanāsana (Upward Facing Plank)
- Sitting down with your feet stretched out in front. Place your hands slightly behind your hips, fingers facing forward. Grounding through your feet and hands, lift your buttocks off the floor and press your hips to the sky. Draw your shoulder blades together to help support you.
- Hold for five breaths. This is targeting your rhomboids and trapezius muscles.
Amp It Up: Add ten reps to it. Lower yourself up and down. Each time you lower yourself down relax your upper back, that way your back and shoulders are going through full range of motion to really work the back.
7. Salabhāsana (Locust Pose Variation)
- Lie down on the floor, face down. Legs stretched out behind you, and arms by your hips with the palms facing down. Rest your chin on your mat and soften your neck. Draw your navel into your spine, press your hips and palms into the floor. Engage your buttocks and thighs and lift them off the ground.
- Hold for three breaths. This is targeting your erector spinae and quadratus lumborum (lower back muscles) giving you a strong lower back.
Amp It Up: Add repetition to it! Lower your legs up and down eight times.
Great Job — You’re Done!
Lay down on your back and hug your knees to your chest. Just let everything relax and sink. Add in a couple more twists if you like, then finally come to rest in Śavāsana.
I hope you enjoyed this fun hybrid practice! Be sure to check out the other articles in the series: leg flow and chest and tricep flow. What did you think of adding weights into the practice? Do you have other favourite āsanas for your back? Let me know in the comments and make sure you tune in next week for a flow on working your shoulders!