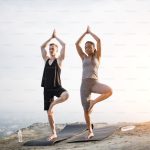
Newton’s third law of motion states that for every action there is an equal and opposite reaction. The same should be true of our yoga practice.
Restorative yoga sequences get a bad rap, especially if you’ve started yoga as a form of exercise. However, it’s essential to have a healthy balance of physically demanding sequences (like a Hot Vinyāsa class) with gentler sequences that help your body recover (such as Yin Yoga). Doing this ultimately allows your body to gain more benefits from the more difficult flows since it’s rested and prepared to be challenged.
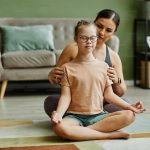
Restorative sequences are also great for people who are recovering from injury or working with disease. Micro-movements like the ones we’re looking at in this sequence are especially useful for people with limited mobility such as the elderly or people with diseases such as Multiple Sclerosis. There’s also nothing like relaxing on a pile of blankets, bolsters, and blocks to counteract stress and anxiety.
Micro-Movement Restorative Sequence
Grab all your props and a mat. Turn on some relaxing music and let’s sink down into our bodies.
1. Legs Up The Wall (Viparita Karani)
- Find an open wall space. Start seated with your left side body in contact with the wall and your feet on the floor in front of you. Pivot yourself onto your back and extend your legs up against the wall so the bottoms of your feet are facing up. Press your sitting bones and calves against the wall, with your back and head resting on the floor forming a 90-degree angle in your body.
- If you find this position uncomfortable in any way, or just wish for extra cushion, you can use your prop here. By pressing the bottoms of your feet into the wall, lift your hips slightly and slide your prop underneath your hips. Let the back of your head be heavy and your neck be in a neutral position. Soften your face and your throat. Let your hands rest either on your belly or down by your sides, palms facing upwards. Close your eyes and breath deeply through your nose.
- Stay here for anywhere from 5-15 minutes. To come out, bend your knees and push the bottoms of your feet into the wall, lift your hips slightly. Gently roll to one side, being sure to slide your support out of the way if you have used one. Stay on your side for a few breaths before returning to your seat.
Modification: If the ground is uncomfortable for you, you can do this on your bed. It may bring more ease and comfort into the pose.
2. Relaxing Bolster Twist
- Sit with your right hip next to the bolster and legs bent at the knee. Turn your torso towards the bolster. Place your hands on either side and slowly lower yourself down. Rest your right ear on the bolster. Relax into the twist and breath deeply.
- Stay here for 5-10 minutes. To come out, slowly press your hands into the ground to lift up your torso. Switch to the other side.
Modification: If the bolster is too low for you, pile on the blankets. If you experience any pain in your knees or hips, prop up with more blankets or blocks.
photo from www.yogaoworldnetwork.com
3. Supported Child’s Pose (Bālāsana)
- Start with your knees wide and toes touching. Place a bolster in between your knees. Place your hands on the ground on either side of the bolster and slowly lower yourself to rest over it. Let your arms relax either by your sides or above your head.
- Stay here between 10-15 minutes, breathing deeply and slowly. Slowly press yourself up to come out.
4. Reclining Bound Angle Pose (Supta Baddha Konāsana)
- Place a bolster parallel to the mat and lie down on your back, feet flat on the ground and knees bent. Your lower back should be off the bolster. Slide your feet close to your groin and open your knees up, bringing the soles of your feet together. Bring your arms to the ceiling and let them fall back into your sockets before opening them up wide in a “T” position, letting them rest comfortably on the ground. Relax your head onto the bolster.
- Stay here for 5-10 minutes breathing slowly and deeply. To come out of it, slowly bring your hands back to the outside of your knees and draw your knees back together with your feet flat on the ground. Let your hands come to the floor by your side and press slowly up.
Modification: Place blocks or blankets underneath the knees so you don’t pull too much on the groin or knee caps. You can place more blankets on the bolster if it’s too far down. If the ground is too far away for your hands to rest comfortably, you can rest them on your stomach.
5. Supported Corpse Pose (Śavāsana)
- Start sitting on your mat with your knees bent and feet flat on the floor. Slide a bolster or blankets underneath your knees. Slowly lower yourself down to the ground. Place a blanket underneath your head. You can roll up a blanket and place it under your neck for more support and comfort. Slide your legs long so the back of the knees are resting comfortably. Hands come to the ground by your sides with the palms facing up. Fully relax into this final pose.
- Stay here for 10-15 minutes. Breathing evenly and letting your body absorb the practice.
Transitioning Out Gently
End with some prānāyāma breathing in either a seated position or in Śavāsana and let your body absorb the benefits of your practice. These are just a few of the more restorative poses that are available to you when your body is sore and tired? What are some of your favorite restorative poses? Let us know in the comments?