All About Sun Salutations
As you’re starting out, yoga can be a little overwhelming for many people. I’d recommend beginning your yoga journey by trying a few Sun Salutations, which will give you a great foundation on which to build a regular practice. On it’s own this sequence is a fully comprehensive workout with a multitude of benefits such as targeting and toning muscle groups and increasing blood circulation. It helps calm the mind and improves concentration, helping people make better decisions and act mindfully in the moment. It even stimulates the thyroid gland to help with weight loss!
Traditionally, Sun Salutations are carried out at sunrise, when the air is fresh and there are fewer distractions. The Sanskrit term for Sun Salutations is Sūrya Namaskār A. ‘Sūrya‘ means ‘sun‘ and ‘namaskār’ means ‘reverence’, so the flow literally means to pay reverence to the sun! The sequence moves through all seven chakras, and especially targets the solar plexus (the chakra just above the navel). Focussing on the solar plexus enhances creativity and willpower, and it also tones the abdominal muscles which isn’t a bad side effect!
Even if you can’t practice in the morning, the great thing about this sequence is that it can be practised at any time of day, particularly if you need to take a 15-minute break from your computer. The entire sequence builds heat in the body, and brings the mind and body into the present so that you end up feeling refreshed, energised and ready to continue with your day.
Breaking Down Sūrya Namaskār A
The series starts in Mountain Pose, or Tādāsana. Stand with both feet together and breathe deeply in and out of the nose. This is the Victorious Breath, or Ujjāyī Prānāyāma, which generates heat in the body and eliminates toxins. During these first few breaths, try to bring your awareness to some of these points:
- Ground yourself down by distributing your weight evenly between the heels and toes. Plant your feet firmly into the ground, engaging your leg muscles.
- Find an upright posture by rolling your shoulders down the back and pointing the tail bone down.
- Every time you exhale draw your naval closer to the spine. This engages the abdomen and the Uddīyana Bandha energy lock.
As you start to move through the poses, try matching the speed of your breath to every movement.
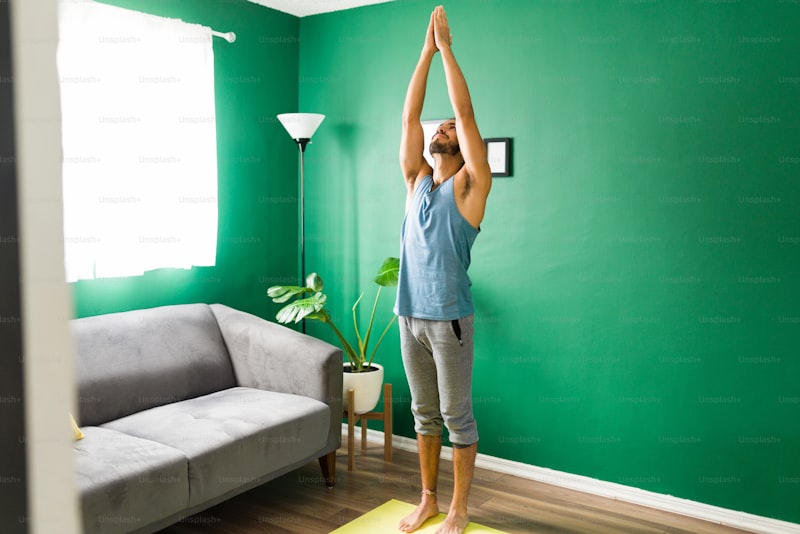
Step 1 – Upward Hand Pose (Ūrdhva Hāstāsana)
Pose Basics: On an inhale, raise your arms above your head and look up at your thumbs.
Keep In Mind: Try not to over arch and compress the spine, you should just feel a gentle stretch in the front of the body. Soften your shoulders down, extending the space between your ears and shoulders and elongate your neck.
Step 2 – Forward Bend (Uttānāsana)
Pose Basics: Exhale and fold forward from the hips. Take the chest towards the knees and look towards the toes, placing the hands beside the feet. This pose strengthens and lengthens the hamstrings and back muscles and creates a feeling of peace.
Keep In Mind: Draw the navel into the spine and relax the head and shoulders. Bend your knees if your hamstrings are tight, or use blocks to rest your hands on. This keeps the integrity of the pose without straining.
Step 3 – Half Foward Bend (Ardha Uttānāsana)
Pose Basics: Inhale and lengthen the spine, placing fingertips on the floor. This is regarded as a preparation for Downward Facing Dog.
Keep In Mind: Keeping your gaze on the ground just ahead of you helps lift the chest and straighten the spine. This pose targets your core and back muscles, so it’s especially important to keep the abdominals engaged in order to protect your back.
Step 4 – Four-Limbed Staff Pose (Chaturanga Dandāsana)
Pose Basics: Exhale and step or jump back into a plank. Draw the navel to the spine and slowly lower the body with control until it is parallel with the floor. This is a warming pose which strengthens the wrists and builds muscles on the arms, shoulders and back, while lengthening and strengthening the abdominal muscles.
Keep In Mind: Push the heels towards the back of the mat in the plank to engage the legs and core. When lowering down, try to keep your elbows tucked in close to the body as it’s much harder on your elbow joints if they are splayed out. If this is difficult, try lowering your knees to the ground until you build the strength in your upper body and core.
Step 5 – Upward Facing Dog Pose (Ūrdhva Mukha Śvānāsana)
Pose Basics: On an inhale, straighten the arms and roll over the tops of your feet, lifting your chest to the sky. This gentle back bend opens the shoulders and upper back, strengthens the arms and tones the legs.
Keep In Mind: Point your toes and try to keep the thighs off the mat while keeping the bottom relaxed. Push the chest upwards by pressing the floor away with the hands and rolling the shoulders down the back. Don’t let your head collapse backwards, instead think of the back of your neck straightening to the ceiling.
Step 6 – Downward Facing Dog Pose (Adho Mukha Śvānāsana)
Pose Basics: Exhale and lift the sitting bones up to the sky, pushing back to make an upside down V with your body. Stay here for a few breaths, allowing your heels to relax towards the floor on every exhale.
Keep In Mind: If you have tight hamstrings, feel free to bend your legs in this pose. Not everyone’s heels will reach the floor so don’t worry, if yours don’t – it is more important to keep the sitting bones lifted. Hands should be shoulder distance apart and feet hip distance apart.
Step 7 – Forward Bend (Uttānāsana)
Pose Basics: On an exhale, walk or jump the feet to the hands keeping the feet together. Inhale and straighten your legs while keeping your chest glued to your thighs.
Keep In Mind: Release your neck and let your neck hang low, letting gravity help with the stretch. This is a great pose for relieving digestion and headaches.
Step 8 – Upward Hand Pose (Ūrdhva Hāstāsana)
Pose Basics: Exhale in the forward bend, and stand all the way up on your next inhale keeping the spine straight. Bring your hands back above the head and look at your thumbs.
Keep In Mind: Once again, don’t collapse the back of your neck and crush the vertebrae in your spine, think about it straightening towards the ceiling instead as you look back.
Step 9 – Tādāsana (Mountain Pose)
Pose Basics: Exhale your hands down to the sides of the body and come to stillness. Close your eyes and feel the sensations in your body.
Keep In Mind: You can repeat the series as much as you wish, and once you’re done you can turn off the Ujjāyī breath and return to a normal breathing pattern.
What’s Next?
Congratulations! You have just completed a Sun Salutation! From here you can build off to many other series, including Sun Salutation B which includes Chair Pose (Utkatāsana), which helps reduces flat feet, and Vīrabhadrāsana 1 Pose, which is a fantastic hip opener.
So why not give the Sun Salutation a shot next time you’re stuck at the computer, short for time, or playing around with a home practice! Why not let me know in the comments when and where you use this sequence and how you see it change your day?