
Looking for something new to try this year? Thinking that yoga looks cool and it is SOoooo good for you, right? Maybe you want to try it but classes don’t work for you or you just have no time / transport / spare money. Or does the idea of working out in public freak you out? So, thinking that maybe yoga isn’t for you after all? Then you are SO wrong! Yoga IS for you and here is a little sequence you can try in the comfort of your own home for free.
WHAT DO I NEED?
As with all things, there are a few pieces of essential equipment that you will need –
- Your body – whatever shape, size, age or fitness it is, YOUR body IS perfect for yoga…
- Comfortable, loose clothing – nothing flash or trendy, just clothes that you can move freely in.
- Floor space – Enough space to roll out an exercise mat if you have one, or a towel. A carpet or rug can be nice if you don’t have a mat and grass is wonderful to practice on … well, maybe not in winter…. Ideally have space to spread your arms out wide at shoulder height when you lie down too.
WHEN DO I DO YOGA?
You can do yoga any time of day – first thing, morning, afternoon or evening, whenever it suits you and your life. It is best to leave a bit of time after eating otherwise you may get queasy. I advise leaving 2 hours after a main meal and about an hour after a light one. Similarly don’t drink a big drink just before you practice – try to hydrate well before you start if you can.
ANYTHING ELSE I NEED TO KNOW?
Yes, yoga should never hurt. This is really important so I am going to say that again – YOGA SHOULD NEVER HURT. If something hurts – don’t do it. In yoga we have a wonderful saying that goes like this –
‘Listen to your body’
We spend so much of our life ignoring our body as we push it to do more and more that it can be weird to suddenly tune in to what it is telling us. But if your body is hurting – stop what you are doing, it is not right for you today. This does not mean you have failed. It means you are wise and you are to be congratulated. Well done!
It is OK to feel stretching as long as that stretch feeling stays the same or reduces as you hold a pose. If it increases – you are pushing too hard. Ease off until you get back to a comfortable stretch (and congratulate yourself again).
It is OK for muscles to work hard and it is definitely OK for them to feel tired after yoga. It is even OK for them to be a bit stiff and sore the next day. But they shouldn’t be so sore that you can’t do it all again if you want to. If you are REALLY stiff after this sequence, try doing a it less next time until you find a level that suits your body then build up as you get stronger.
And, yes, it is OK to feel a bit silly as you get used to the poses and movements. Most of us have times when we feel like a creaky old door as we move from one pose to another – you are in good company!
SO HERE GOES …
This sequence should take about 10 – 15 minutes to do it all. Or feel free to pick one or two poses to do if you only have 5 mins to spare.
1. LIE DOWN
I like to start on my back with my knees bent. Have your feet apart and your knees rested together so that you can relax. Close your eyes and take a few deep breaths. As you breathe, think about where your body is moving and what each breath felt like. This is sometimes called ‘becoming present’ or ‘centring’. Try at least 5 deep breaths – more if it feels good.
2. CHILD POSE
Roll on to your hands and knees then lower your bottom towards your heels as far as you can comfortably. Then move your head towards the floor. If you bottom starts to lift up as your head goes down you can rest your head on your hands or arms if you like. Once again take a few deep breaths and notice which parts of your body are moving.
If you are comfortable without your head supported on your arms you can try stretching your arms overhead to get a shoulder and chest stretch. Or you can put your arms buy your side. Play around and see what works best for you – there is no right or wrong place for them to be.
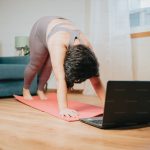
3. DOWN DOG
Move back on to your hands and knees before tucking your toes under. Press through your hands as you lift your knees off the mat and straighten them. Your hips should now be the highest part of your body as you make a sort of pyramid shape with your spine and head pointing towards the floor. Keep the knees a bit bent unless you are super flexible and do not expect to get your heels on the floor just yet.
You can simply hold here for a few deep breaths or pedal your heels up and down one at a time to ease into a gentle stretch in the back of the legs. Do whichever feels nicest for you.
4. PLANK
From down dog, roll forwards so that your shoulders are over your hands and your body is parallel with the ground. You can stay here for a few breaths if you want to or move straight on to lowering the body down to the floor. Ideally you keep the body straight all the way to the floor. If you find you belly flop or wobble on the way down it is best to drop your knees to the floor before lowering. If your knees are down, concentrate on keeping the body in a straight line from knees to hips and shoulders to build the core strength needed here.
5. COBRA
Place your hands under your shoulders with the palms down. Draw your shoulder blades gently towards your waist to take your shoulders away
from your ears then press on your hands to lift your chest away from the mat. Keep your hips firmly in contact with the floor so that you are arching your back. Do not expect to get your elbows straight – just go as far as you are comfortable.
6. AND REPEAT
Lower back to the floor when you are ready then come back on to hands and knees again. At this point you can move on to the next pose or repeat is whole sequence a few times. I love to do the whole thing about 3 times to really get used to the movements before I move on.
7. KNEE ROLLING
Lie on your back again. This time with your feet and knees together and your arms out to the side at shoulder height or lower if it is more comfortable. Now roll your knees slowly from side to side going as far as you can comfortably each way. Aim for 3 – 5 complete cycles to left and right breathing out as your knees lower to the side then breathing in as they come back to the middle. Breathe as slowly as you can comfortably and keep the legs moving in time with the breath. This slow breathing starts to get us relaxed ready for the final pose of this sequence.
8. RELAXATION
Also known as corpse pose, this is the traditional way to close a yoga session. It is tempting to skip it if you are busy but you are SO missing out if you do. This pose brings the calmness and clarity that yoga offers in addition to the strength and mobility elements. I think you’ll love it!
Lie on your back with your knees bent or straight – whichever is most comfortable. If the knees are bent, place the feet hips width apart and rest the knees to gather just like at the start. Wrap yourself up in blanket if you want to – it is important to be comfortable for this pose. Close your eyes and allow your breath to come naturally. Imagine that you are sinking into the mat with each breath out for a couple of breaths. Then work around the body one limb at a time and consciously ‘let go’ of any tension. Relax the belly, the back, the chest, neck and head too. Once you are completely relaxed focus on your gentle breath to help to clear your mind. See if you can stay there all relaxed for a little while – you could set a timer for maybe a minute or two at first – longer if it feels good.
9. GET UP SLOWLY
When you are ready to move it is important not to leap up and rush off. Try spending a few moments with the eyes still closed to wriggle your toes and fingers, maybe move your ankles and wrists. Gently bend up the knees if they have been straight and try rolling them a little side to side or gently hugging them to your chest. Do whatever feels nice. Then roll on to one side before sitting up slowly.
Then take a moment to notice how you feel… Maybe you feel different to when you started, maybe you don’t. There is no right answer here – just the delicious luxury of listening to what our body is telling us.
AND FINALLY…
This sequence is suitable to do every day if you want to or less often if that suits you better. It can be all you do or it makes a great warm up or cool down for other activities like running or a gym workout. The more you do it, the easier and more flowing it will become.
You may notice you get stronger or move mobile. You may start to feel better in your self – calmer, less stressed and more comfortable in your body. And remember this is only the beginning of a journey – if you like this then yoga has SO much to offer you. So take that first step and see where it takes you.